The BOPD is designed to help students learn the value of documenting the engineering process, much like engineering project teams do in the "real world". The BOPD is a series of questions/activities that directly relate to what teams will be doing during the 6-8 week building and programming process. It includes 3 periods, each reflecting a different phase of the engineering process which will be judged and scored at set times throughout the season. Teams will be rewarded for insightful, concise descriptions of their process.
The BOPD is an important part of the Botball program for several reasons:
To access your team's documentation area you will need to complete the following steps:
These activities will involve uploading one or more files, as specified by the activity. Three steps are required to complete BOPD file upload activities:
Step One: Upload the files that you wish to submit as your response to that activity. You must upload files one at a time. The number of files required, or allowed, is specified as part of the description for each activity.
Step Two: Edit the Notes field for the activity to provide an explanation of the files you have uploaded. The Notes option is always available, but is not required for all activities. If the notes field is required, this will be indicated in the description of the activity.
Step Three: Send the submission for scoring. You MUST complete this final step, or we cannot score your submission.
These activities require you to compose a short response . Each activity specifies different information that should be provided. In order to submit a response, go to the BOPD page for that activity and click the Edit My Submission button.
When editing your submission, you can choose from a number of Formatting options. In general, the best one to choose will be Moodle Auto-Format. Using this option will preserve line breaks, and automatically make urls into active links. You can also use some HTML for further formatting. If your response includes IC source code, then you might need to specify plain text. For details, or to view information on your other formatting options, click on the yellow help icon next to the Formatting options.
Upload files to complete these documentation activities:
Provide written responses on the following topics as directed:
Upload files to complete these documentation activities:
Provide written responses on the following topics as directed:
Upload files to complete these documentation activities:
Provide written responses on the following topics as directed:
Our judges spend a considerable amount of time and effort evaluating your responses for each activity. Your scores for each documentation period will be available through the web site by 5pm CST on the Friday following the close of that documentation site period.
| Scoring for Text Answers | |
|---|---|
| 0 | No response, or response completely unrelated to the topic |
| 2 | Somewhat addressed the topic |
| 4 | Did a good job addressing the topic |
| 6 | Exceptional, insightful documentation |
| Scoring for File Upload Answers | |
|---|---|
| 0 | Nothing uploaded, or response completely unrelated to the topic |
| 2 | Uploaded file(s) somewhat fulfilled the requirements |
| 4 | Uploaded file(s) did a good job fulfilling the requirements |
| 6 | Uploaded file(s) were exceptional and/or insightful |
In all three documentation periods, one of the required documents is a Botball Project Plan. Judges will be looking for the following elements when grading your project plans:
The Botball Project Plan should be a living document that grows and changes over the course of the Botball season. As you progress, goals will be added and removed, your schedule will change, tasks will get completed, etc.When the judges look at your plan, they won't be scoring how much progress you've made. Instead, they'll be focused on how well you've documented your progress.
We've created sample project plans that you can adapt for your use, but you are not required to use them. If your team uses some other project planning tools, there is no need to copy that information into our templates. Just give us what you're already using. For example, if your team uses a white board to manage this information, you could upload photographs of that white board at different stages of the project.
These examples were made in Excel, but any software with similar functionality could be used, including the freely available Google Docs and Open Office.
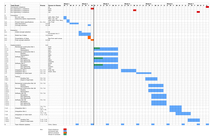
This kind of planning document is most appropriate for teams composed of several members. Names are assigned to each task -- but tasks that are still weeks away may not yet have people assigned to them. The assigned person is the one responsible for making sure it is done -- not necessarily the one doing all of the work.
Blue tasks are as scheduled. Red items are fixed milestones. Orange means that that task is that many days behind schedule. Green means that that task is that many days ahead of schedule.
Prerequisites refer to the tasks that need to be completed before this one can be started (note that the green tasks were started before their prerequisites were completed -- this may be ok if, in this instance, all of the top 3 tasks required similar software and similar mechanics in at least one robot. In that situation, one would not need a final selection to start working on the software or mechanics for one of the robots.)
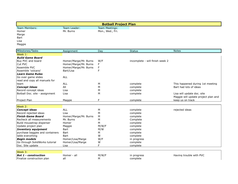
This is a simpler project schedule that might be more appropriate for teams with only a few members. It tracks the project in less detail, but also requires less time to update.
Here, each milestone is listed in bold, and then followed by information on each task required to reach it, including due date, assigned team members, and task status. Our example was made with Excel, but a document like this could easily be created as a text file, or in html.

Some teams prefer to use off line planning tools, like white boards or bulletin boards. If your team prefers to organize itself in this fashion, you can upload images of these materials documenting the planning stages of your project. If you choose this option, make sure that the pictures you submit clearly present your planning to the judges, and provide explanations as necessary in the Note field for the activity.
Only one file may be submitted for this assignment, so if you need to send multiple images to document your planning, you will need to put them in a zip file or embed them in a single document using a tool like Word or Open Office.
The following file formats may be used for uploading your responses where directed:
The maximum size for each individual file upload is 7MB
The official rules for Botball are defined by the Botball Game Document and the FAQ. Changes and clarifications made in the FAQ supercede the Botball Game Document. If its not written down in the FAQ or the Game Document, then its not official.
The Botball FAQ consists of several databases of questions and answers broken down by topic. You can find the list of FAQ databases on the Botball Team Home Base under Botball Tools.
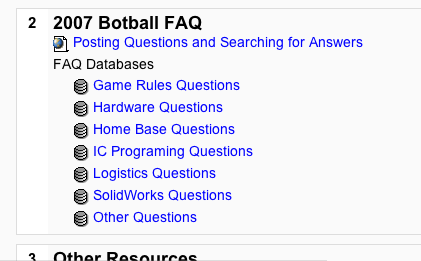
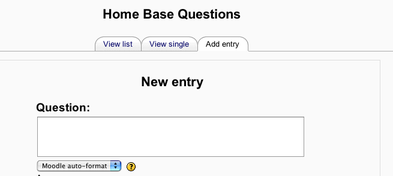
When you have a question that is not answered in the other documentation, you may find an answer in the FAQ Databases located in the Botball Tools section of the Team Home Base. Before adding a new question, try browsing or searching the FAQ to determine whether or not your question has already been answered. ou can view a list of all the questions in the database, or you can search the database. You can also sort the FAQ Databases by the date the question was entered, or alphabetically.
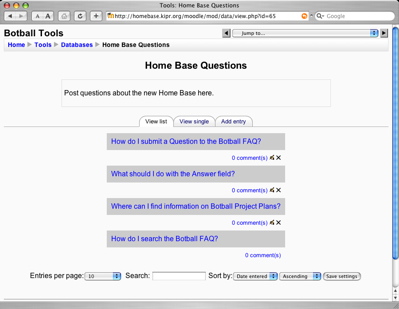
If you can't find the information you need, then add a new question. Select the Add Entry tab from within the appropriate FAQ Database. Enter your question, and provide any additional information that FAQ requires. If you are posting Interactive C source code in your question, you may want to use the plain text formatting option to preserve the indentation of and any special characters in your code.
Once your question has been submitted and answered, it will appear with an answer in the Botball FAQ, usually within a day or so.
In order to upload files to your team's web space, you must use the File Upload Tool.
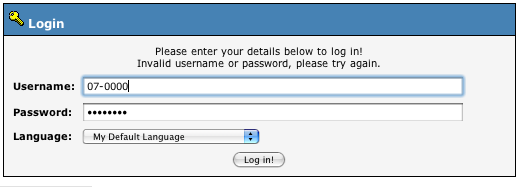
You can log in to the File Upload Tool using your the same team code and password that you use to log in to the Team Home Base. Your team code looks something like 07-0000 and your password was mailed to your team leader when your team registered.
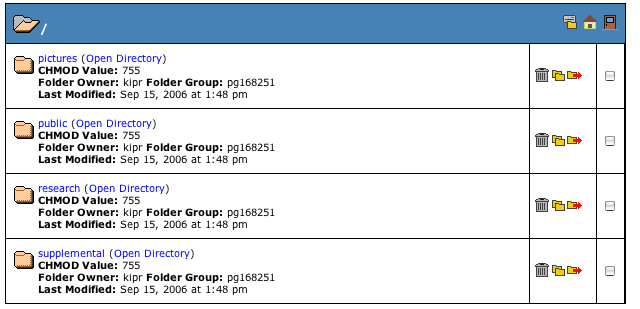
After logging in, the File Upload Tool will display the contents of your home folder. In this folder are four folders:
picturespublicresearchsupplementalFor the most part, you will be uploading files to the public or research directories. The research folder is reserved for the Research and Design Web Site Challenge. The public folder is space where you can construct a public site for your team. The other directories are largely unused at this point.
To view the contents of a folder, click on its name
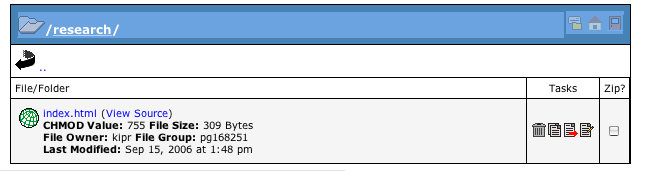
In this example, we're viewing the contents of the research folder. It contains one file, index.html
| Folder | File | |
|---|---|---|
| Delete |  |
 |
| Copy |

|
 |
| Move |

|

|
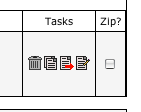
For each file, there is a set of task icons. To manipulate the files in your web space, click on the icon corresponding to that file and the task you wish to perform. The icons are somewhat cryptic, and files and directories use different icons for the same tasks. If you get confused, consult the Icon Legend at the bottom of each page in the File Upload Tool.
Other tasks are available for some kinds of files, but these generally are not used.
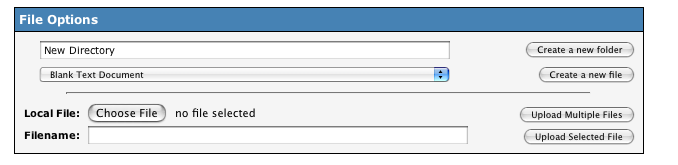
When you are viewing the contents of a folder, you can use the File Upload Tool to upload files to that folder, or create a new folder in that folder
To create a new folder, find the File Options section of the File Upload Tool Page. Type the name of the folder that you want to create in the blank labeled New Directory, and then click on the Create a new folder button.
To upload a file, click on the Choose File button and select the file on your computer you wish to upload. Then, click Upload selected file
You can also click on the Upload Multiple Files button, which will allow you to select and upload several files at a time. Note that the maximum size of a file upload is about 7MB, regardless of whether it is one or multiple files.